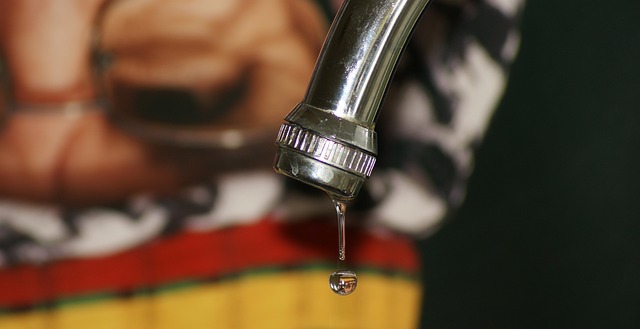
If you’re kept awake at night by the sound of a dripping faucet and worried about the amount of water you’re wasting, you can relax. Fixing a leaky faucet is a quick and inexpensive task that even the most inexperienced DIYer can handle.
Leaky faucets are typically caused by worn out washers or gaskets, loose O rings, or corrosion in the valve seat. These issues can be easily detected and fixed with a faucet repair kit. A faucet repair kit is readily available in most hardware stores. Damaged or deteriorated faucet parts are often the culprit behind leaks in kitchen faucets, particularly in older homes.
This article will guide you through the steps to repair a leaky faucet. This guide allowing you to save water and money in the process.
Step by Step Guide on How to Fix Leaking Kitchen Faucet:
1. Turn off the water supply
If you need to fix a dripping faucet, the first step is to turn off the water supply.
To do this, twist the valve located under your sink until the water supply is shut off. If there are no individual shutoff valves, you will need to turn off the water supply for the entire house. Once the water is off, turn on the faucet and leave it open to let any remaining water in the line flow into the sink.
As a precaution, you may want to insert a sink stopper or cover the sink opening with a towel. The purpose is to prevent any tools or parts from accidentally falling down the drain.
2. Remove the Handle
Removing the faucet handle will depend on the type of faucet you have.
For faucets with a set screw behind the handle, you’ll need to insert a hex key or Allen wrench into the screw and turn it to remove the handle.
If your faucet handle has a top screw cover, you should use a flat screwdriver to pry it off and set it aside. Once the cover is removed, use a Phillips head screwdriver to loosen the screw located underneath the cover.
After you have loosened the screw or set screw, you should be able to pull the handle free. This will give you access to the faucet’s internal components, allowing you to repair or replace any damaged parts.
3. Remove the Cartridge or Stem
The faucet cartridge or stem is a crucial component found in many types of two-handled faucets in both kitchens and bathrooms. This part is responsible for controlling the flow of hot and cold water to the faucet.
To access the cartridge or stem, you will need to remove the handle assembly. Using a wrench, carefully loosen the packing nut, then remove it and set it aside. Once the packing nut has been removed, gently pull the cartridge or stem straight up and out of the assembly.
It’s important to handle the cartridge or stem with care during removal and inspection to avoid damaging the part. If you notice any signs of damage or wear and tear, such as cracks, corrosion, or mineral buildup, it may be time to replace the part to restore proper function to your faucet.
4. Install New Cartridge
Once you have determined that the cartridge is the source of your leaking kitchen faucet, the next step is to replace it.
Replacing the cartridge or stem can be a bit challenging as they come in various shapes and sizes. The easiest way to find the right replacement part is by identifying the faucet’s manufacturer and model number. If you’re unsure, take the old cartridge or stem to the store for reference.
Before installing the new cartridge or stem, clean and dry the area around the handle and all the parts with a clean cloth. Inspect the O-rings around the housing and replace any that appear damaged or worn.
Once the area is clean and dry and any damaged O-rings have been replaced, insert the new cartridge or stem, ensuring it is correctly aligned. Carefully reassemble the faucet, making sure all parts are securely tightened and the handle is properly positioned. Turn on the water supply and test your faucet for leaks. If everything looks good, you can now enjoy your drip-free faucet.
5. Reattach the Faucet Handle
After replacing the cartridge or stem and turning on the water line, it’s time to reattach the faucet handle by following the steps in reverse order. Then, remove any debris or towels from your sink and turn on the hot and cold water for a few minutes to check for any clogs in the aerator. The aerator is the component attached to the end of the faucet spout that regulates the water flow. In case of any buildup, it can be removed and cleaned to ensure continuous water flow.
What causes a kitchen faucet to leak at the base?
When it comes to leaking kitchen faucets, the most common culprit is often the O-ring seal located at the base of the faucet. Over time, this seal can become dirty or worn down, leading to a constant and frustrating leak that persists even when the sink is turned off. Fortunately, replacing the O-ring is a relatively simple and inexpensive fix that can be accomplished by even the most novice DIYer. By following the steps outlined in this guide and taking the time to properly diagnose the cause of the leak, you can save both water and money while ensuring that your kitchen faucet is functioning at its best. Remember to always shut off the water supply and use caution when disassembling and reassembling the faucet components.
Can sealant stop water leaks?
In order to create a seal that keeps out water and air but still allows for movement, a water-resistant and breathable sealant is utilized to fill gaps. Silicone is a popular sealant used to create a waterproof and protective joint seal, due to its versatility and durability.
Can you tape a leaky faucet?
To protect the glossy areas of your faucet from getting damaged by a wrench, encircle them with two layers of masking tape. In case the water leakage occurs when you twist the faucet handle, adhere to the first three steps outlined below. If there’s a packing nut on the faucet, carefully wrap it with tape and tighten it gently, without over-tightening it.
Conclusion
A leaking kitchen faucet is not only annoying, but it can also waste a significant amount of water. The good news on how to fix leaking kitchen faucet is a simple task that anyone can handle. By following the steps outlined in this guide, you can quickly identify the source of the leak and replace the necessary parts. Remember to turn off the water supply before beginning any repairs. Also take the necessary safety precautions to avoid damaging any parts or injuring yourself. With a little patience and some basic tools, you can fix a leaking kitchen faucet by yourself!
Read also: How Do Touchless Kitchen Faucets Work?
 Hi, my name is Debra Klein and I love modern kitchen designs! As a product reviewer, it’s my mission to help homeowners choose the right modern kitchen accessories for their homes. I want to give them the best solution possible so they can make the best decision for their needs. Thanks for reading!